30 May, 2013

Bonfire

Fire from  Ladies' Retreat, 2012.
     One of my favorite parts of camping is the bonfire.  Camping is not camping without a bonfire.  What I don't like about camping is all the bugs.  I'm not sure if it is the woods or the water that attracts them more, but camp is always full of them.  The front yard however, not so buggy.  So of course we love to have bonfires at home for no real reason.
A fire that was accidentally started when some boxes were thrown into the fire pit a day after the fire was extinguished.  Scary, isn't it?
     When we moved here, there was already half an oil tank that was being used as a fire pit, so we kept it and are using that years later.  It is starting to warp considerably from all of the heat, but that doesn't stop the grass from growing around it.  We like to throw all of our paper trash into it to keep it out of the landfills.  We almost always throw all of the cardboard boxes and such into it to burn next time.  We were a bit surprised when The Man's uncle threw some boxes onto it on Memorial Day while we were outside and it suddenly started smoking.  The fire had been out since the night before, but before we knew it the fire was pretty large.  It's a good thing the kids were not out by themselves at the time.
The Big One sticking her mallow in May 2007.
     Some of our favorite things to do by the fire are of course to roast hot dogs and marsh mallows as well as get toasty warm, but we also have some other things we like to do.  We like to watch how something burns and how it differs from the other things we put in.  We like to see if anything makes the flames burn a different color as some things will do.  We also like to lay things over the fire and make guesses on which side collapses into the pit first (use caution with this one).
Broofy's Dad at camp, 2008.
     We have bonfires any time of year if we can.  Of course we prefer them when the ground is not covered in snow.  Are you allowed to have bonfires where you live?  How often do you have them?

Mini Golfing... For Free

Broofy, Streaker, and Baby Bee in May 2013.
     Of course, if you have ever been mini golfing, you know that it is not generally very free.  We just happen to have a very sweet and generous man at our church who owns the local Family Fun Park and he allows us to visit once or twice a year.  If you go to church, it's nice to try to attend all the outside activities, they are a lot of fun and a great way to get to know your fellow parishioners better.  And having more friends is almost always a good thing.
Streaker waiting her turn.
     At this particular event, each member of the church gets to go and have an ice cream and as much mini golf, batting cages, and go karting as you can fit in the day, as well as "fire truck" rides.  It's always super fun.  We decided to do the golfing first because we knew that the kids would want to spend all day at the karts, which they did.  Turns out that by the time we got out there, we had already lost The Big One and the Punk only stayed for half of it *sigh*  Can't keep a kid pinned down, can you?
Baby Bee watching Broofy make his shot.
     This year for the first time ever I got not just one, but TWO hole-in-one's.  Yay!  Streaker even got one!  In all though, I do believe it was one of my worst games.  It was Baby Bee's first time ever mini golfing and she enjoyed it quite well.  She lined the club up to the ball and used her foot to kick the club.  She did great for someone her size.
The Big One at a Gifford's golf course.  (2011?)
     I was actually surprised that The Big One did not take part in a game while we were there.  She is always asking to go mini golfing, but I suppose the call of the karts was too loud.  We will try to get her out golfing sometime this year.  There are several golf courses in the area, of course they are not all free to use.  *smile*
     I would be lying if I did not consider the idea of setting up a mini golf course in the back yard.  You can't blame me though, right?  It would be super easy to dig small solo cup sized holes through out the yard and make some small skewer and paper flags to place behind them.  Keep an eye out for a post about solo cup golfing.  Have you ever been mini golfing?  Did you love it?

Puddle Jumping!

Baby Bee running back and forth on Memorial Day 2013.
     I do not know a single child who does not gravitate like metal to a magnet toward a puddle when they see one.  There is just something about puddles that attract children.  Perhaps the water, cool and refreshing.  Maybe the squishy bottom, all gooey between their toes.  Or maybe it is because generally we frown at the idea of their beautiful clothes getting dingy and kids live to test boundaries.
The Big One got creative with a milk jug in 2009.
     The past two weeks have been almost all rain.  I wish I had thought to get them outside with their bathing suits.  Instead we stayed in, went stir crazy, and just about tore each others' heads off out of sheer boredom.  Sound familiar?  Well if you are getting rain, why not dress them in rain appropriate garb and send them out for a while?  You can welcome them back in with cocoa and warm cookies :)
The Big One, Baby Bee, and Streaker in the puddle on Memorial Day 2013.
     However, as I mentioned, I didn't think to do that because I was crazy miserable from all the damp drizzle outside for the better part of two weeks.  So when the sun did finally come out on Memorial Day, we took advantage.  And as children do, they found their way to the puddles.  Some day soon, we will make paper boats and try them out in the puddle, but I'd say they had plenty of fun without them.
Streaker last year.
     When we do allow the kids to play in the puddles, I try to send them in clothes that will be easy to wash or that I don't necessarily care about.  You'll notice that The Big One is in pretty much all white.  That is also as far into the puddle as she went, lol.  The kids tend to get pretty dirty when they play in the puddles and that's okay.  They can even get their hair muddy, it will come out *wink*
Streaker on Memorial Day 2013.
     However, we can be party poopers when it comes to mud fights.  This is mainly because dirt in the eyes does NOT make for fun.  I got dirt in the eye once and it was terrible!  I tend to be stricter with my children about things that I have personal experience with.  Are you like that?
The Punk and Spaz in the puddles, 2009.
     We haven't actually ventured into the art of mud pies or mud sculptures yet.  Hopefully we can do that real soon.  Until then, we will certainly take advantage of the puddles when they come out to play.  Do your kids play in the puddles?

217 Free Things to do in the Spring

The Big One having fun at a free church event.

     It's amazingly difficult to come up with 365 free things to do in the Springtime without using a lot of the same things as the Summer list.  That said, I will post this list as it is and I WILL come up with 148 more things... some day.  For now, please enjoy this list of 217 free things to do in the Spring, however late this list may be.  Also, you will notice that a few things are in fact also found on the Summer list.  That is because these things are essential to outside fun :)  What do you do for fun that's free?

1.  Make a wind catcher
2.  Make a papier mache globe
3.  Start a garden
4.  Make a sun catcher
5.  Go cloud watching
6.  Do some flower pounding
7.  Make a mailbox and start leaving notes for family members
8.  Make homemade perfume
9.  Do a color changing flower experiment
10.  Grow flowers
11.  Make stepping stones for the garden
12.  Make something out of play dough
13.  Have a poetry reading
14.  Make mud sculptures
15.  Explore an ant hill
16.  Build a bird house
17.  Make grass head dolls
18.  Go frog hunting
19.  Grow a bean fort
20.  Have a scavenger hunt
21.  Try your hand at geocaching
22.  Play in the rain
23.  Make a wormery
24.  Have a picnic
25.  Take a hike
26.  Ride bikes
27.  Play golf
28.  Search for four-leafed clovers
29.  Puddle jump
30.  Feed the birds
31.  Skip rocks
32.  Bake cupcakes
33.  Visit the Farmer's Market
34.  Go camping
35.  Play a ball game
36.  Make a marble run
37.  Invent a new snack mix
38.  Sketch a budding flower
39.  Have a spa day
40.  Learn a magic trick
41.  Watch a storm
42.  Create a cartoon character
43.  Learn a new card game
44.  Create a book of dreams and goals
45.  Make boats from milk cartons
46.  Race the boats down a creek
47.  Build an indoor fort
48.  Wash the car
49.  Visit the library
50.  Make a pet rock
51.  Teach something
52.  Create a board game
53.  Play tag
54.  Play dress-up
55.  Crack some marbles
56.  Tell jokes
57.  Do a science experiment
58.  Make box cars
59.  Use the box cars to have a movie night
60.  Make a bird feeder
61.  Make a Spring Break album and fill it with everything you did during Spring Break
62.  Play some camp games
63.  Make a croquet set
64.  Practice or make some tongue twisters
65.  Wash the windows
66.  Have a crazy hair day
67.  Start a new book
68.  Play in the rain
69.  Draw with chalk on the pavement
70.  Collect flowers and learn about them
71.  Clean up at a local park or playground
72.  Play restaurant
73.  Have a bonfire
74.  Draw a map of the neighborhood
75.  Practice your signature
76.  Do leaf drawings or rubbings
77.  Make a secret hiding spot
78.  Start a club
79.  Write a book as a family
80.  Start a new good habit
81.  Do some spring cleaning
82.  Practice doing some Random Acts of Kindness
83.  Have an outdoor treasure hunt
84.  Learn how to make dandelion crowns
85.  Go somewhere new
86.  Play catch
87.  Play follow the leader
88.  Dry some flowers
89.  Roll down a hill
90.  Build an outdoor fort
91.  Try a new fruit or veggie
92.  Find where they are playing free movies and go watch one
93.  Make maracas
94.  Try making natural dyes
95.  Make a princess hat
96.  Arrange flowers
97.  Invent a new outdoors game
98.  Make your own bicycle basket
99.  Play in the dirt
100.  Learn about an animal
101.  Learn about your ancestors
102.  Play Mancala with dirt and rocks
103.  Play bean bag toss with rice filled socks
104.  Have an indoor picnic
105.  Find a pen pal
106.  Sew something together
107.  Make a match box car track
108.  Play musical instruments
109.  Sing together
110.  Make a music video
111.  Make silhouettes
112.  Look into local VBS programs
113.  Collect seashells
114.  Play school
115.  Make a paper chain to count down the days til Summer vacation
116.  Pillow fight
117.  Learn Origami
118.  Attend a story time hour at the local library
119.  Clean out your closet or bureau and donate old clothes
120.  Do the same for toys :)
121.  Do some yard work
122.  Volunteer
123.  Make a smoothie
124.  Blow bubbles
125.  Start a family blog
126.  Go tailgating
127.  Interview a family member
128.  Refashion a t-shirt
129.  Got Ivory Soap?  Blow it up!
130.  Practice writing upside down and backwards
131.  Make a nesting ball
132.  Climb something
133.  Dye eggs
134.  Have a playdate
135.  Explore things up close with a magnifying glass
136.  Make recycled paper
137.  Cut the bottom off a gallon jug and play catch with a ball
138.  Go for a wagon ride
139.  Go on a nature color hunt
140.  Have some one on one time with someone
141.  Explore a tree
142.  Make up a new dance
143.  Take an evening stroll
144.  Hunt for apple blossoms
145.  Pick some berries
146.  Go to the beach
147.  Play baseball
148.  Make a cardboard dollhouse
149.  Start a weekly family fun night
150.  Choose a family member to be 'guest of honor' for the day
151.  Have a grandparent come tell stories
152.  Have a fancy formal night
153.  Paint something - make your own paints!
154.  Snuggle
155.  Call up a friend or family member
156.  Hunt for lost change around the house - check pockets!
157.  Try making bread from scratch
158.  Draw on your windows - make rainbows or stage an alien invasion
159.  Take a nap :)
160.  Build something with blocks
161.  Make a home movie
162.  Soak in the tub
163.  Answer "what if....?"
164.  Try your hand at "planking"
165.  Make a cookbook of each family member's favorite recipes
166.  Make a cardboard city for matchbox cars
167.  Stack cups
168.  Have a storytime
169.  Draw with sticks in the dirt
170.  Classify and categorize rocks from outside
171.  Make a chore chart
172.  Catch a meteor shower or watch for falling stars
173.  Make a set of flashcards
174.  Try your hand at homemade pasta
175.  Play twister outside
176.  Build something with scrap wood
177.  3-legged races
178.  Share stories
179.  Make letter shapes with your bodies
180.  Go pillow jumping
181.  Play "chin-heads"
182.  Pretend to be statues - can you get the statues to move without touching them?
183.  Build a terrarium
184.  Make a treasure map and hunt for treasure
185.  Make a water wall
186.  Snake bubbles!
187.  Play finger puppets
188.  Roll a ball back and forth on the floor
189.  Design your own maze
190.  Make paper hats
191.  Have a "Penny Walk"
192.  Give horsey rides
193.  Play tug-of-war
194.  Use a paper towel tube as a megaphone
195.  Mirror each other
196.  Create a faerie garden for the faerie house to go in
197.  Walk around the neighborhood
198.  Make a nature wand
199.  Make jam with fresh picked berries
200.  Go to a sports game
201.  Have a race
202.  Eat something new
203.  Have a fake power outage
204.  Set up an emergency plan
205.  Have spoon races
206.  Make a bird bath
207.  Make a den in the woods
208.  Have a Staycation
210.  Yarn race
211.  Give Piggy Back rides
212. Have a friend come over
213.  Vacuum something
214.  Look at family photos
215.  Start a journal
216.  Color in a coloring book
217.  Organize something

22 April, 2013

Hunting for Critters

     Well, it's that time of year again.  The woodpecker is knocking, the frogs are croaking, and the geese are honking on their way back from the south.  It's time to critter hunt!  This year already we have found snails, caterpillars, lady bugs, squirrels, pheasants, frogs and many kinds of stingers.  Lil' Mama has even been stung already and the snow has just barely left us!
     While we were at Cricket's house Friday the kids spent plenty of time trying to capture poor innocent amphibians, mainly frogs.  Spaz was especially talented at the catching part, he snagged several of them.  Of course we tried to discourage them from holding onto them too long because the frogs didn't seem overly fond of their predicament.
     Turns out frog's eyes don't actually pop out when they are poked, so Cricket photoshopped the frog above to reflect the mood.  I think it came out pretty darn cute. That frog was surprisingly content and didn't try to hop away like most frogs would.  In fact, I think it rather liked being the focus of the camera.  Don't believe me?
     Have you gone critter hunting yet this year?  Find or catch anything good?

Camp Out During the Day

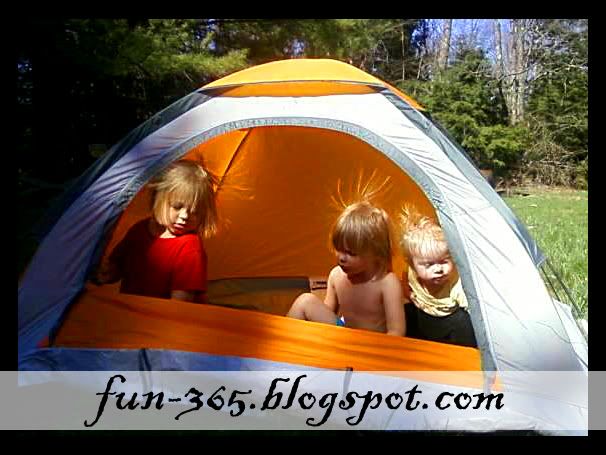
     Just because you have a tent doesn't mean you have to go spend the night in the woods somewhere.  You can have just as much fun right in your own back yard.  And this weekend, we did.  Streaker has a birthday on Monday and was really itching to get a tent set up, so we decided to give her a present early.  It was her very own tent.  It happens to already be damaged, but we will look past that and get to the fun of it all.
      It so happens that the Maine camping season is not as long as we would like.  Unless you have a heater, you can't start spending the night outside until June.  We have definitely made plans to do just that, but for the mean time, we needed daytime fun.
     So after the set-up, which was really easy, we took turns playing bear and shaking the tent from every which angle every few seconds.  The girls inside would scream and laugh so hard and so loud that there really was no separating the two sounds.  And the person outside had fun just watching them squirm with fear.  We also had some giggles over the funny hair the girls all seemed to get when inside the tent.
     Baby Bee had different plans with our old Goodwill doggie tent.  She slept for quite some time, which is just fine because she tends to burn very easy, and under the tent she was perfectly safe from those nasty sun rays that plague her.  The tent was so fun that we decided to bring it to Auntie Cricket's house to share with the boys.  Lil' Riot and Spaz had a great time camping out in the day.  Even The Gamer got in on the fun for a few minutes.
     Of course no fun comes without a few rules.  There was absolutely no horsing around allowed inside the tent or any eating either.  That didn't seem to stop the kids from having fun, possibly because they paid little attention to the horsing around rule.  We'll definitely be adding more tents to our backyard this summer.   The new one was only about $23 at Walmart, so it will be something we can add to the girls' birthdays this year without too much strain on the wallet.
     We also set up a fire at Cricket's and had fun with some more camping activities, stay tuned for those posts.
     Have you ever done a daytime camp out?

15 April, 2013

Firmoo Review

     My daughter has astigmatism.  I was surprised to first hear that she may need glasses after a routine eye check at school.  She had passed her Kindergarten test with no real concerns.  But come 1st grade, all of a sudden there was definitely concerns.  We knew she would need glasses.  She was nervous about the idea of being seen in glasses, so to calm her worries, I decided that I would make myself an eye appointment and we could do this whole thing together.  Having never worn glasses, I knew I was in desperate need for an eye exam and I knew I probably would need my very first pair.  I was actually glad when I received a prescription (though a small one) because it meant that The Big One wouldn't be by herself in that venture.  But when I went to choose frames out for myself, I was told that my insurance would not cover glasses for me, but only for my children.
     I went a year without glasses waiting for the funds to cover a pair.  Then I did finally get a pair from online and it lasted a month or so before my children destroyed them.  They used to like to play with such things, and so I waited a bit longer and got another pair, but accidentally ordered them with a strong tint which I thought to be transitions that would clear up indoors.  No luck, I really only use them while driving.
     So I went another whole year without glasses.  I think my eyes are probably worse now.  But I am happy to say that I have new glasses again and they are the best I have owned.  I don't have to keep reshaping the ear pieces or adjusting the nose bits.  It's just a comfortable and stylish pair.  Though they are made of plastic, I have no worries about them breaking anytime soon.  They feel VERY strong.
     These glasses are from Firmoo.  I had heard about Firmoo in the past.  My sister owns a few pair and she had only good things to say about them.  After seeing them in person, I had to agree that they were awesome.  So I checked out their online eyeglasses store and saw how easy it was to navigate.  Right away I was able to choose to see only women's frames and from there I was able to choose to see only the style frame that I knew I would look good in, which is rectangle.  There were lots of great options for my favorite frame style.  So I decided to use the Virtual Try-On feature on the site.  It showed me what I would look like in the frame that I chose.
     What I love about the Firmoo online store is not only that it is super easy to find the look you are going for, but that you can tell if the glasses will fit you before even opening the individual frame's page.  You get a page full of choices and each choice comes with everything you need to decide if you even want to look at the pair up close.  You can see the measurements in the upper left and the price in the lower right.  You can also see whether they are eligible for single, bifocal or progressive lenses on the bottom along with their average overall rating among customers who have purchased them.  And if you happen to have other questions or needs, they have a great help section with the most frequently asked questions.
     I opted to get a pair of unisex full frame acetate glasses.  It came in the mail after a minimal wait (about a week and a half) and came with a drawstring case, a hard case, a repair kit and quite possibly the best lens cleaning cloth ever.  I love that the screwdriver from the repair kit is a key chain, that is a great little feature for someone like me.  The hard case is very sturdy and about the size of my billfold wallet.  I am glad to have the soft case as well and I think I will use it for my sunglasses to keep them safe in the van.
     These glasses will only set you back $39 plus S&H, which is crazy when you consider that I would have had to pay $80 for JUST the frames at my local eye wear store for the very cheapest they have.  That doesn't include the lenses themselves or shipping.  It also doesn't include a hard case or repair kit.  But Firmoo is amazing in that they have a program where you can get your first pair absolutely free.  Because they are giving away free eyeglasses, they do ask for S&H which is a good deal at just $6.95!  That is an insane deal!
     Have you ever used Firmoo?  Are you going to now?  You can't beat $6.95 for a new set of prescription eye wear :)

Except for the product(s) given to me for the purpose of reviewing, I received no compensation for this post. All opinions are 100% my own.
 

11 April, 2013

Freezer Paper Stenciled T-Shirt Tutorial

     In just a few short days our followers have gone from zero to fifty!  That's just terrific!  I hope you all are out having fun with your kids this week.  My kids and I have big plans today and I hope I can share them with you tonight or tomorrow, depending on if we finish the projects tonight.
     But for now, I thought I would share a project my sister and I did last year with the kiddos.  It was a dollar store project, so for all the kids and us, it only cost me about $9!  We had bleach and freezer paper on hand, but if you don't, you can also find bleach at the dollar store and freezer paper runs at about $2.39 for the cheap brand at my local store.
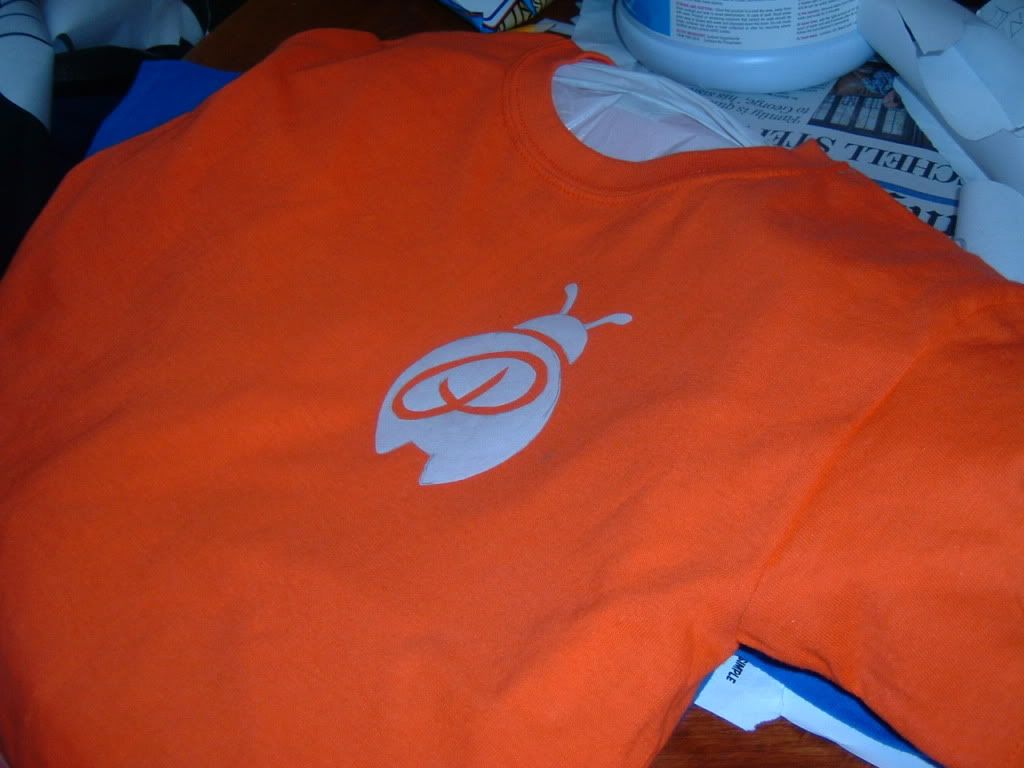
      Here's what we did.  First, you draw up a design for the t-shirt.  My sister made a coffee shirt inspired by a favorite coffee cup and I chose a Pepsi design.  The kids got designs to best suit their interests at the time.  Then you draw that design onto a piece of freezer paper IN REVERSE and cut it out using scissors or an Xacto knife if the design is complex.  When the design is cut out, place it carefully onto the shirt in the spot you want it and iron it well to be sure that all edges are firmly pressed into the shirt.   This creates a seal so that the bleach will not penetrate.
http://i1026.photobucket.com/albums/y322/langleylove13/tshirt%20craft/DSCF0009.jpg
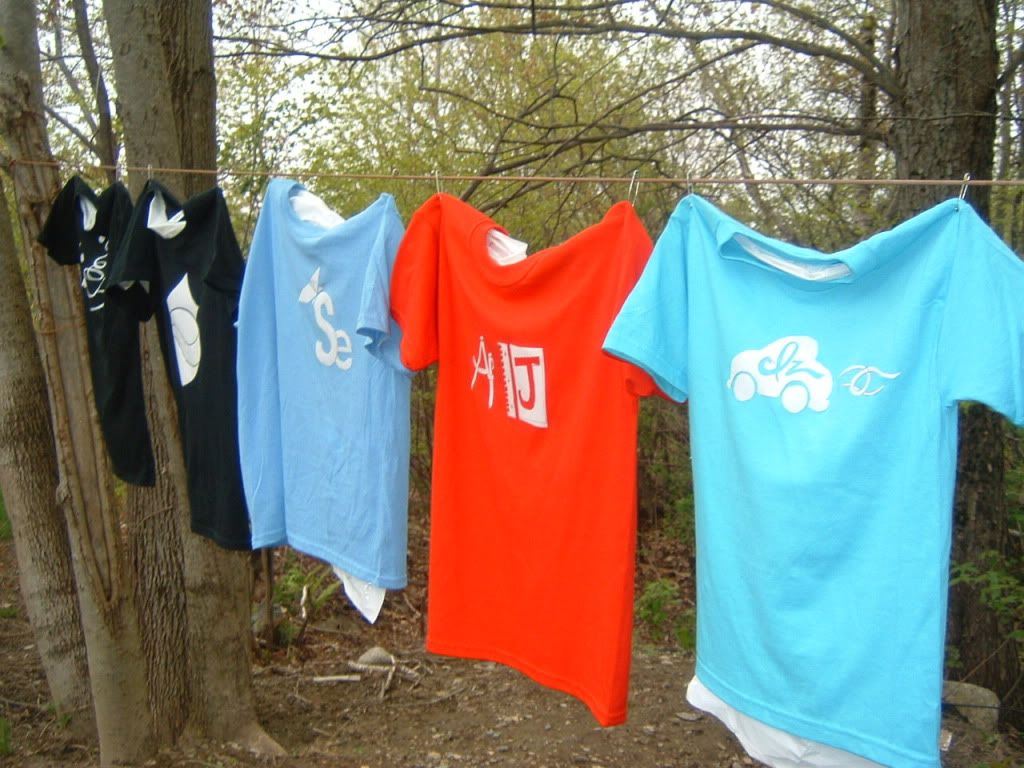
     Next, hang the shirts onto an outside laundry line or tree branch.  We put white kitchen bags inside to prevent the backs of the shirts from being bleached.  You could use card board as well, or any random thing that will fit and protect the back side.  Then you spray with a bleach/water mixture.  I fully recommend doing this on a sunny day.  We did this on a cloudy day and as a result, some shirts did not show that they were bleaching when in fact they were.  Strange, I know, but trust me on this one.  Sunny day.
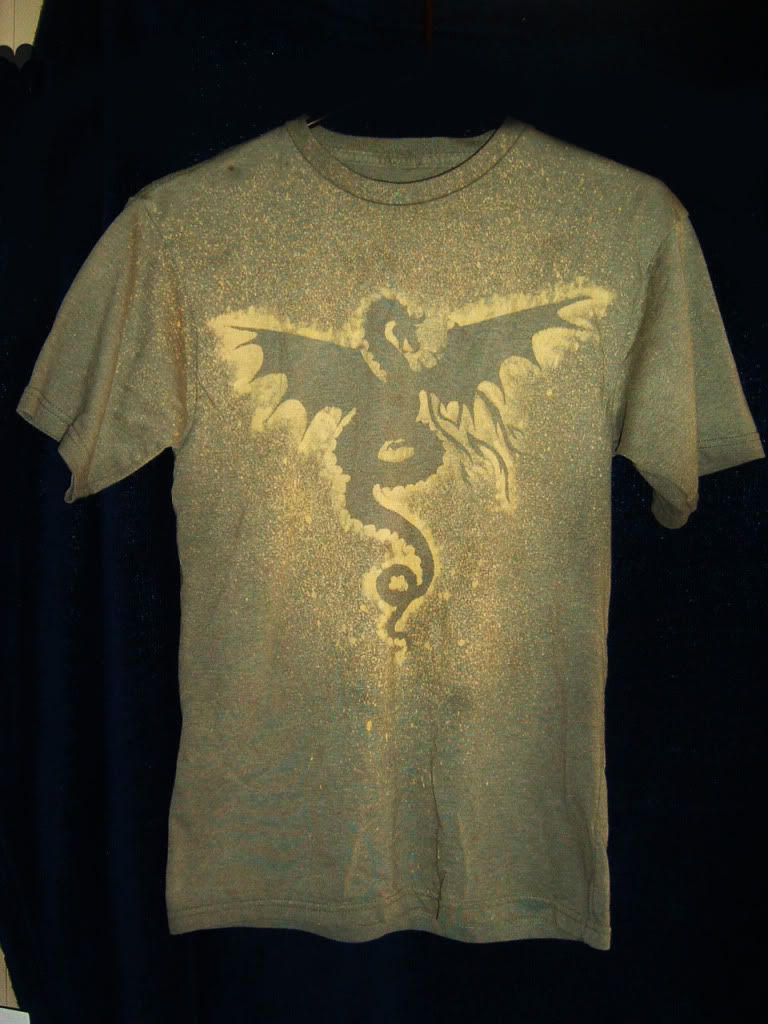
      So we sprayed the shirts with a little bleach, or in some cases a lot and let them sit on the line.  In some cases, we prayed it thick to let the bleach drip and make cool lines running down the shirts.  When the shirt is bleached to your liking, soak it in a bucket of water immediately to stop the bleaching process, then run it in your dryer to wear it.  Or if you are more patient then we were, you can run it through both the washer and the dryer. Here are a few of our results:
     The Good:
     The Bad:
     And the downright Ugly:

     But we learned through trial and error how to fix these mistakes and will be doing it again this summer.  I hope you give it a try.  If you do, please leave a comment letting us know how you did or what you learned in the process :)

02 April, 2013

Bird Nest Tutorial


     What a beautiful day it is today. The past week it has been Winter all over again and I've been pretty down about it, but today God put an end to his little funny and let Spring come back. Thank heaven for it, we are all done with Winter in this home.

      As we walking back back from the bus stop, we came upon some old cut grass on the lawn from last year that had been buried under the snow for months. It was grass and not straw, so it was thin, dry, and brittle and I knew it would be perfect for our bird nest project. So we gathered some up quick as a jiffy and went straight home.

     Next we gathered some mud from the driveway and added some water to make it easier to use. Those are the only two things you need to make a nest, so we were good to go.
     First we took a small clump of flattened grass and put a dollop of mud on top. We then topped it with another clump of grass and smooshed it flat, like a small disc.
     After we had a good base disc, we put a small string of mud around part of the edge and worked a small amount of grass into it and shaped the edge. As we went we found that a bigger and more sturdy base was a must, so we added more inside the middle of the nest and around the outside for support.
     It didn't turn out too badly I don't think. The girls had some trouble with shaping and general construction. If I had to rate this project, I would definitely day it is difficult. Lil' Mama did okay, but needed some help. Boss Lady did okay, but the Lil' Miss had a lot of trouble and asked continually for help. All ended up fairly nest-shaped and they all were happy with their creations though, so all is well.
     We've made some papier mache eggs that we are going to paint to go inside of them when they are done drying. I am not sure where these will end up just yet, maybe on the mantle shelf. The girls want to leave them for the birds to use, but I am not so sure that a bird will use a man made nest. We'll see I guess. Ever try to make a nest? How did it come out?

Kair Bath Visor Review

     Streaker washed her own hair yesterday.  It's a milestone for her, she always has me wash it IF she lets anyone wash it at all.  Last year, we went months with her refusing to let anyone wash it.  I did manage to wash it during that time, but nowhere near as often as it should have been, and I had to threaten to get it done.  Loss of toys, among other things finally spurred her to begrudgingly tolerate it enough to get it done with.
     In fact, only one of the girls lets me wash their hair without a fight, and only if she has a washcloth to cover her eyes while I do it.  It is terrible the way they are so scared of it.  I don't remember ever being scared, probably because back then tear-free MEANT tear-free.  I remember actually rubbing the shampoo onto my eyeball when I was a kid to test the promise on the bottle.  Stupid move for sure, but it didn't hurt at all.  However, I remember a few years ago, I got some "tear-free" shampoo in my eyes, and it wasn't pleasant.  It's no wonder the girls don't want their hair washed.
     Thank goodness for the Kair Bath Visor!  It's a silicone visor with an air cushioned headband that is super soft and contours to any head shape.  It guarantees that there are no leaks down the face while you are washing your kids' hair.
     Streaker loved it from the moment she saw it.  She likes to wear it even out of the shower, but she asked immediately if she could take one to test it out.  So we started the shower and she got in.  She was all smiles when I checked on her a few minutes later and she was very eager to wash her hair (!!!!!)  I was stoked, anything to get her excited about washing her hair is a miracle.  So I gave her some shampoo and helped her collect all of her hair into the top and she began washing.
     At this point, it did slide down her face a few times, I think she had gotten some soap between her head and the visor when she adjusted it.  After we rinsed her off, we tried flipping the visor upside down, like a normal visor would be worn and it seemed to help with that issue because the water from the shower stopped pooling behind the shield.
     Next time we will make sure not to put her under the water until it is time to rinse if she is wearing the visor.  That way, the water will stay behind the shield part and not pool and get too heavy.  But it worked very well considering that it was so slippery from her readjusting it.  It did just as it promised and kept the water out of her face.  (Don't mind the water streaming down her face in that last pic, that was because she stepped under the shower head... silly girl).
     We are in love :)  She washes her own hair now, does a good job without fear of painful eyes, and will rinse without washcloths or crying.  It is amazing.  Look, she's smiling!  That is definitely a success in my book.
     I am very grateful to have the Kair Bath Visor and I do recommend it to any parent with fussy kids, especially those with an actual tub and no sprayer.  This is a lifesaver for sure.  And it comes in blue and green too!
     Do you use any tricks or special products to make your bath time go more smoothly?


Except for the product(s) given to me for the purpose of reviewing, I received no compensation for this post. All opinions are 100% my own.
 
 
Free Website TemplatesFreethemes4all.comFree CSS TemplatesFree Joomla TemplatesFree Blogger TemplatesFree Wordpress ThemesFree Wordpress Themes TemplatesFree CSS Templates dreamweaverSEO Design